Once the integration is activated, you can configure your jobs, send AssessFirst assessment invitations directly from Ashby and view results in the candidate profile.
⚠️ Prerequisite: the integration must be activated beforehand. See the article "How to activate the Ashby integration".
Step 1 — Send a manual invitation
- In the job board, select your candidate.
- In the Current Activities section, click on the "New Activity" button.
- Select "Assessment" in the dropdown menu and then "AssessFirst".
- Select an Assessment type in the drop dowl list (Predictive model in AssessFirst)
- Click on "Start Assessment"
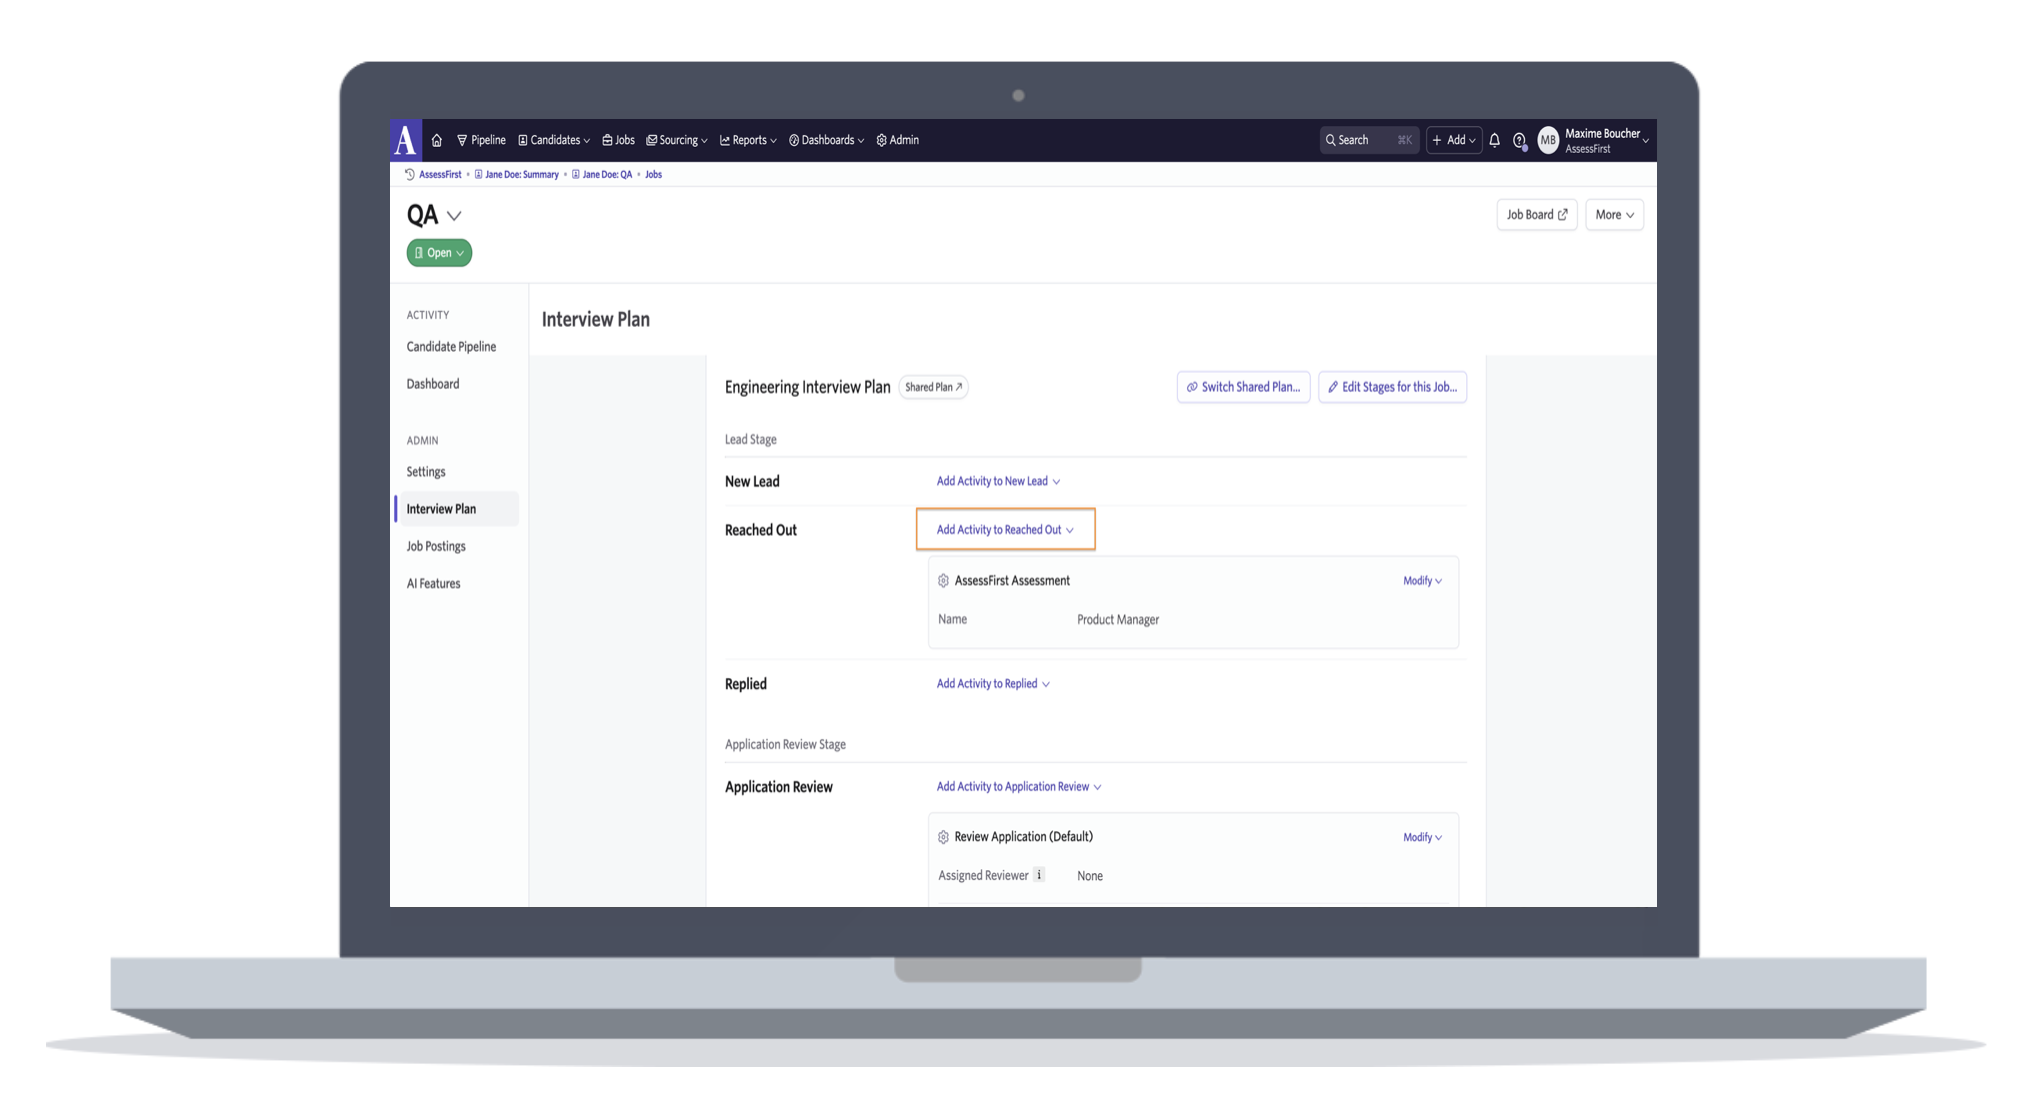
Step 2 — Set up an automatic invitation
- In your Job -> Interview plan
- Add a new activity to the stage at which you want to trigger the invitation

- Select your predictive model
- From now on, when you change a candidate’s status, an invitation will be generated; all you need to do is click ‘Start’ in the candidate’s profile.
Step 3 — Retrieve the results
- In the job board, filter on "Activity status" = "Assessment submitted" to find all candidates who completed the questionnaires.
- Select the candidate to find their results under the Current Activities section.
- Press the arrow ▶️ to discover the global score.
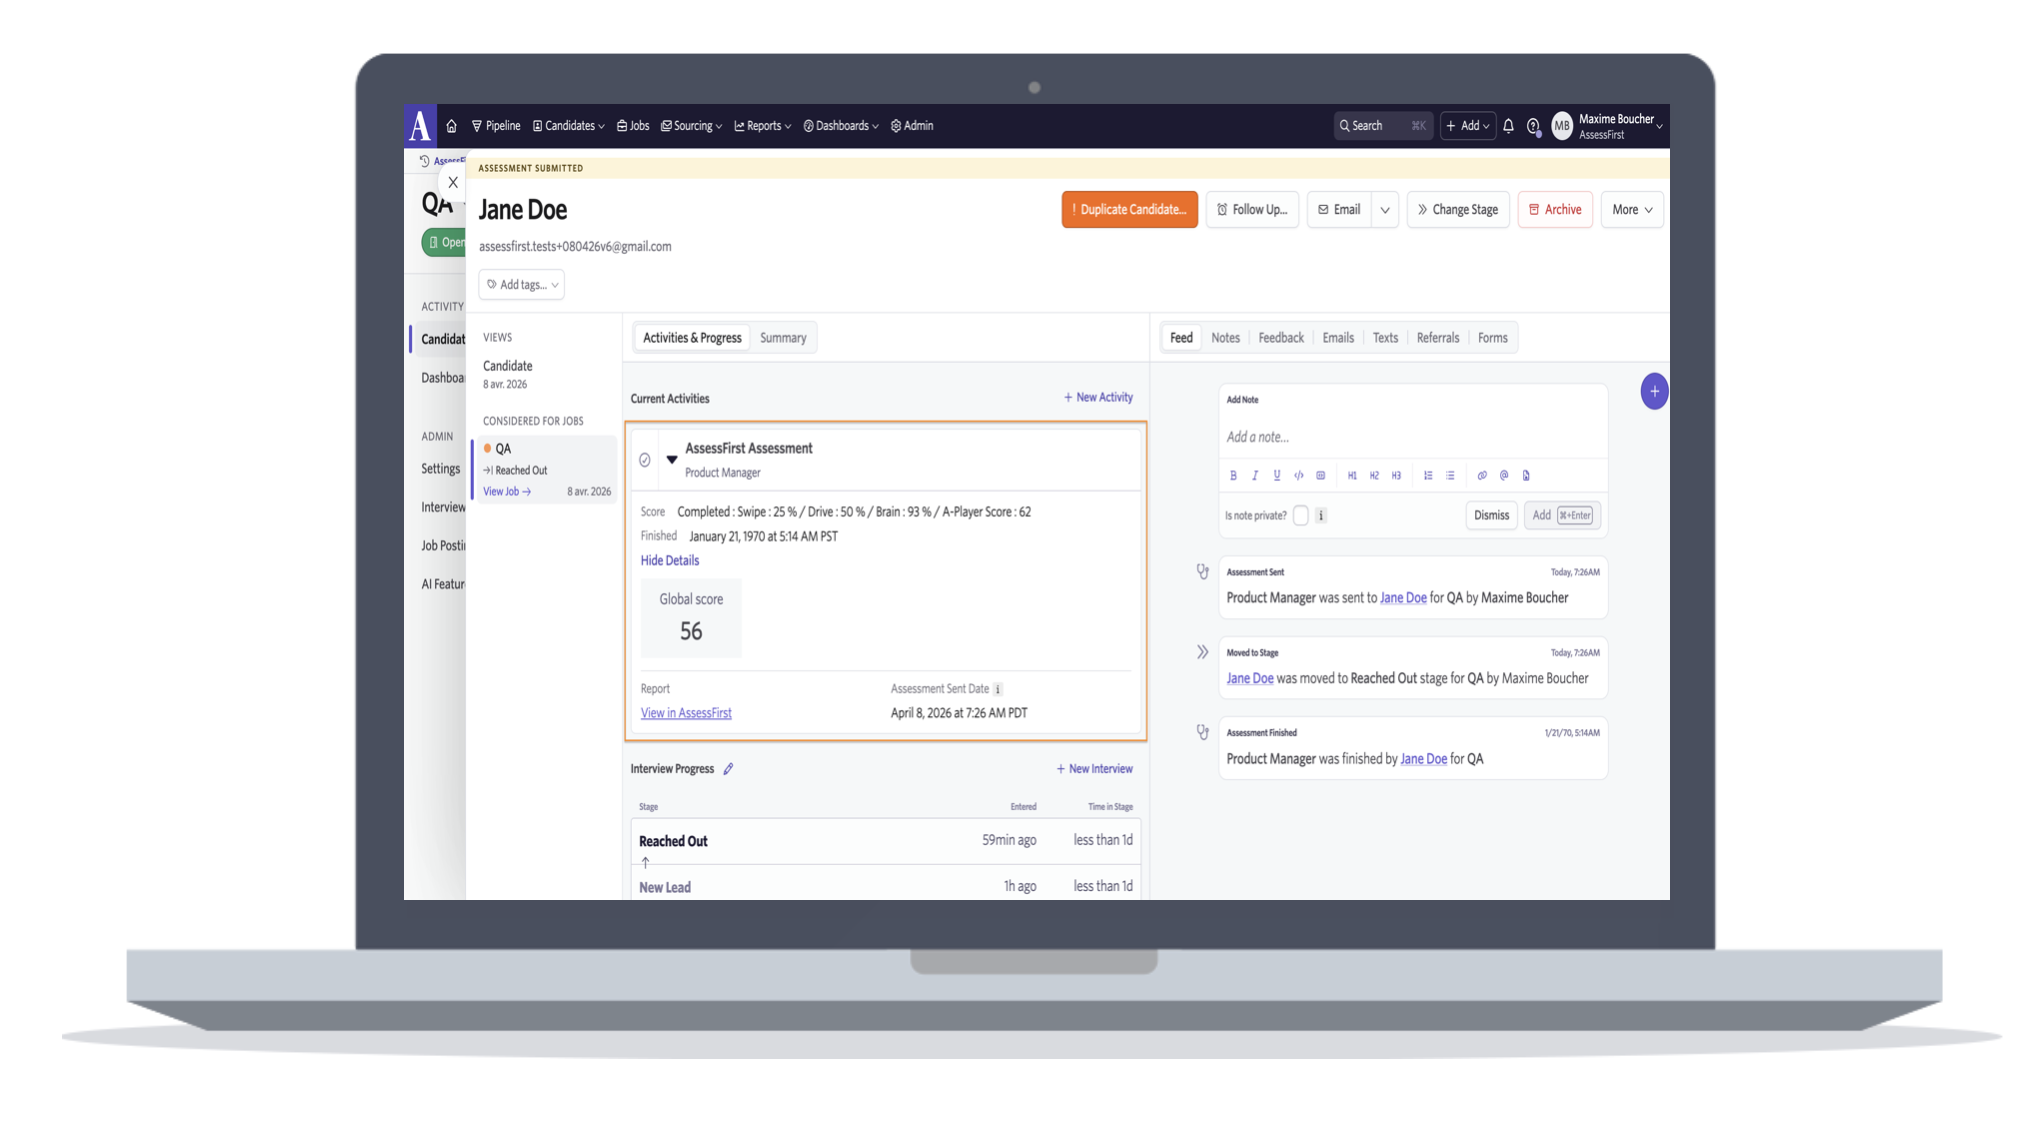
💡 Good to know
- Results are automatically synced from AssessFirst to Ashby as soon as the candidate completes their assessment.
- If you use multiple questionnaires, a score is displayed for each of them.
- The "View in AssessFirst" link redirects you to the full report with all scores and downloadable reports.
To learn how to enable the integration with Ashby, click here.