How to activate the integration with SAP SuccessFactors ?
1/ Create a new object definitions
3/ Create an integration user linked to your API
4/ Add AssessFirst in the assessment vendor list
5/ Add the AssessFirst assessment to the list of assessment providers
7/ Activate the integration in the AssessFirst marketplace
8/ Setting up technical notifications
Access your company settings from your provisioning tenant and activate the “Enable Assessment Integration” feature.
1/ Create a new object definitions
Go to Admin center -> Configure Object Definitions
Create new -> Object definition
- Code : cust_af_pm
- Labelle : AssessFirst PM
2/ Add a custom field to your template
To select a predictive model in your job requisition, you need to create a custom field with the cust_af_pm value.
Go to Manage Templates → Job Requisition -> choose the template you want.
Add a new custom field :
- Field-ID : cust_af_pm
- Field Type : object
- Field label : AssessFirst Predictive Model
- Object type : cust_af_pm
3/ Create an integration user linked to your API
- Create a user that will have "assessfirst-user" as their login (the password isn't important). If you already have an integration user, you can just use this one. The page where this is possible is "Import Employee Data". You will need to download the CSV template and complete the following fields (other fields can be requiered according to your tenant):
- Status: active
- username/first name/last name
- Manager: NO_MANAGER
- HR: NO_HR
- Default locale: en_US
- Create an AssessFirst permission group on the "Manage Permission Groups" page and add the previously created user
-
Grant permissions to this group on the “Manage Permission Roles” page. The required permissions to assign are as follows:
- Recruiting Permissions
- SFAPI Retrieve Job Requisition Permission
- SFAPI Insert Job Requisition Permission
- SFAPI Update Job Requisition Permission
- SFAPI Upsert Job Requisition Permission
- SFAPI Retrieve Job Application Permission
- SFAPI Retrieve Job Applicant Permission
- SFAPI Update Candidate Permission
- SFAPI Insert Job Application Permission
- SFAPI Update Job Application Permission
- SFAPI Retrieve Assessment Order Permission
- SFAPI Update Assessment Report Permission
- OData API Application Export
- OData API Candidate Export
- OData API Job Requisition Export
- OData API Candidate Create
- OData API Candidate Update
- OData API Job Requisition Create
- OData API Job Requisition Update
- OData API Application Create
- OData API Application Update
- OData API Create/Update Interview Central
- OData API Export External Recruiter
- REST API Fetch Recruiter Information
- REST API Permission to Fetch Information about Recruiting Users
- General User Permission
- SFAPI User Login
- Employee Central Foundation SOAP API
- Employee Central HRIS SOAP API
- Employee Central Foundation OData API (read-only)
- Employee Central HRIS OData API (read-only)
- Employee Central Foundation OData API (editable)
- Employee Central HRIS OData API (editable)Employee Central API
- Metadata Framework
- Admin access to MDF OData API
- Miscellaneous Permissions
- AssessFirst PM
- Recruiting Permissions
- Specific rights (Manage Integration Tools)
-
- Manage Integration Tools > Access to Integration Center
- Manage Integration Tools > Allow users to execute "Application/UI" or "Event-based" Integrations
-
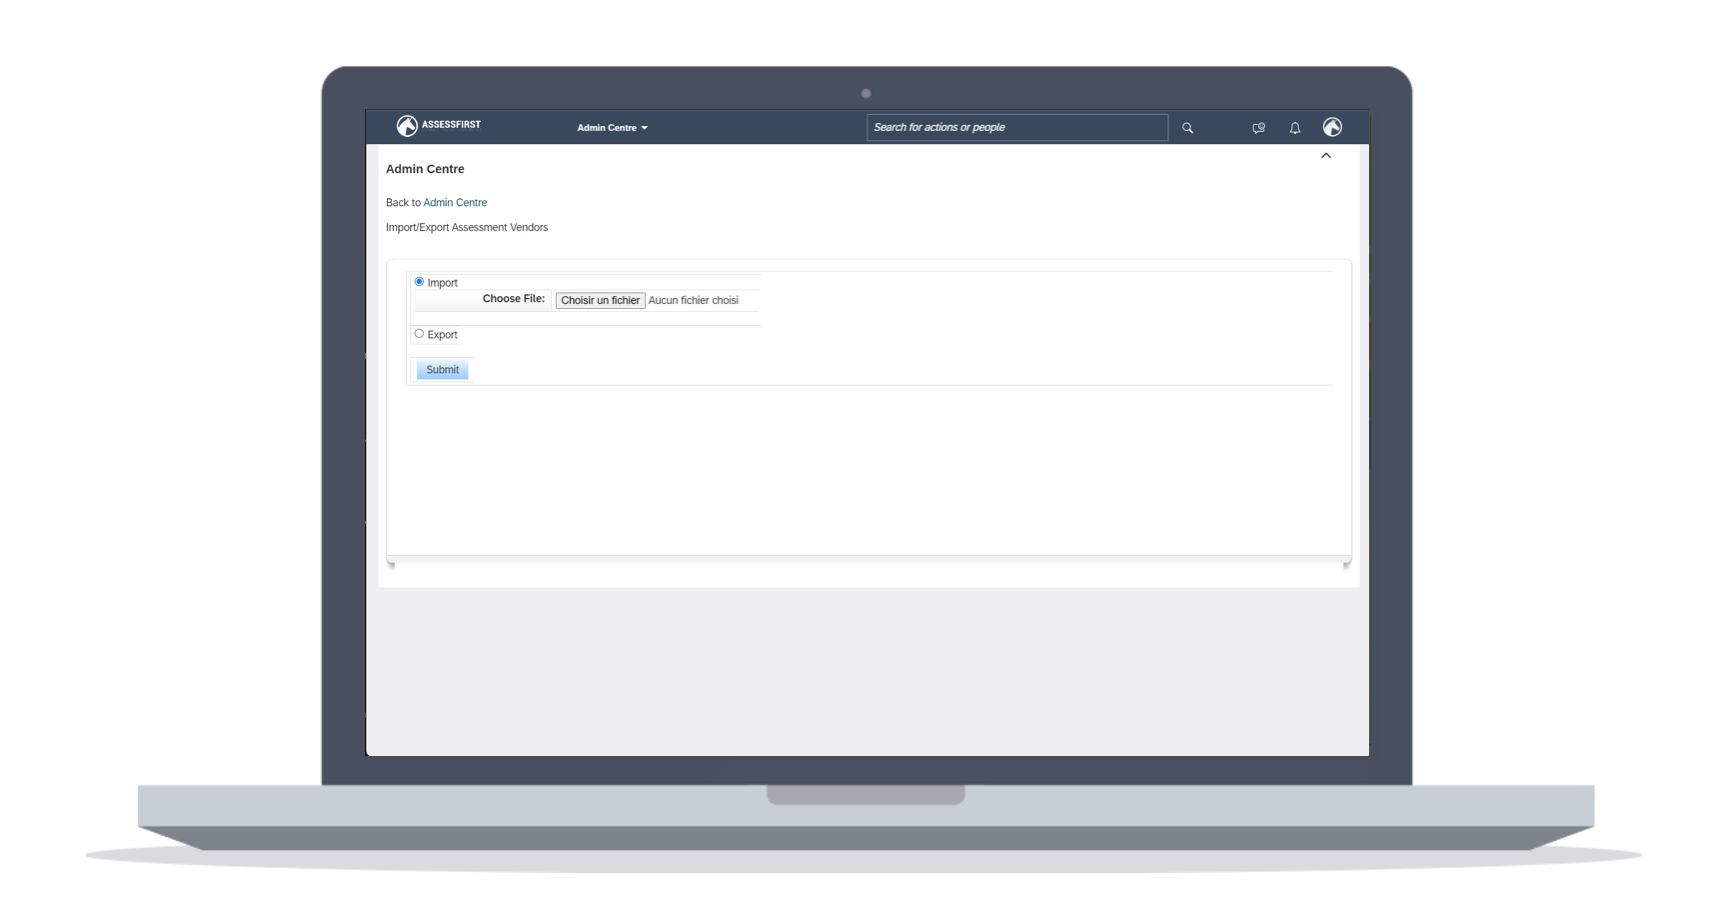
4/ Add AssessFirst in the assessment vendor list
- Go to the "Manage assessment vendors" page
- Export the existing list of assessment vendors
- Add the assessment vendor "AssessFirst" in the downloaded file with the following values:
- externalPartnerCode : ASSESSFIRST
- clientId : ASSESSFIRST
- Go back to the "Manage assessment vendors" page, and import the modified file
5/ Add the AssessFirst assessment to the list of assessment providers
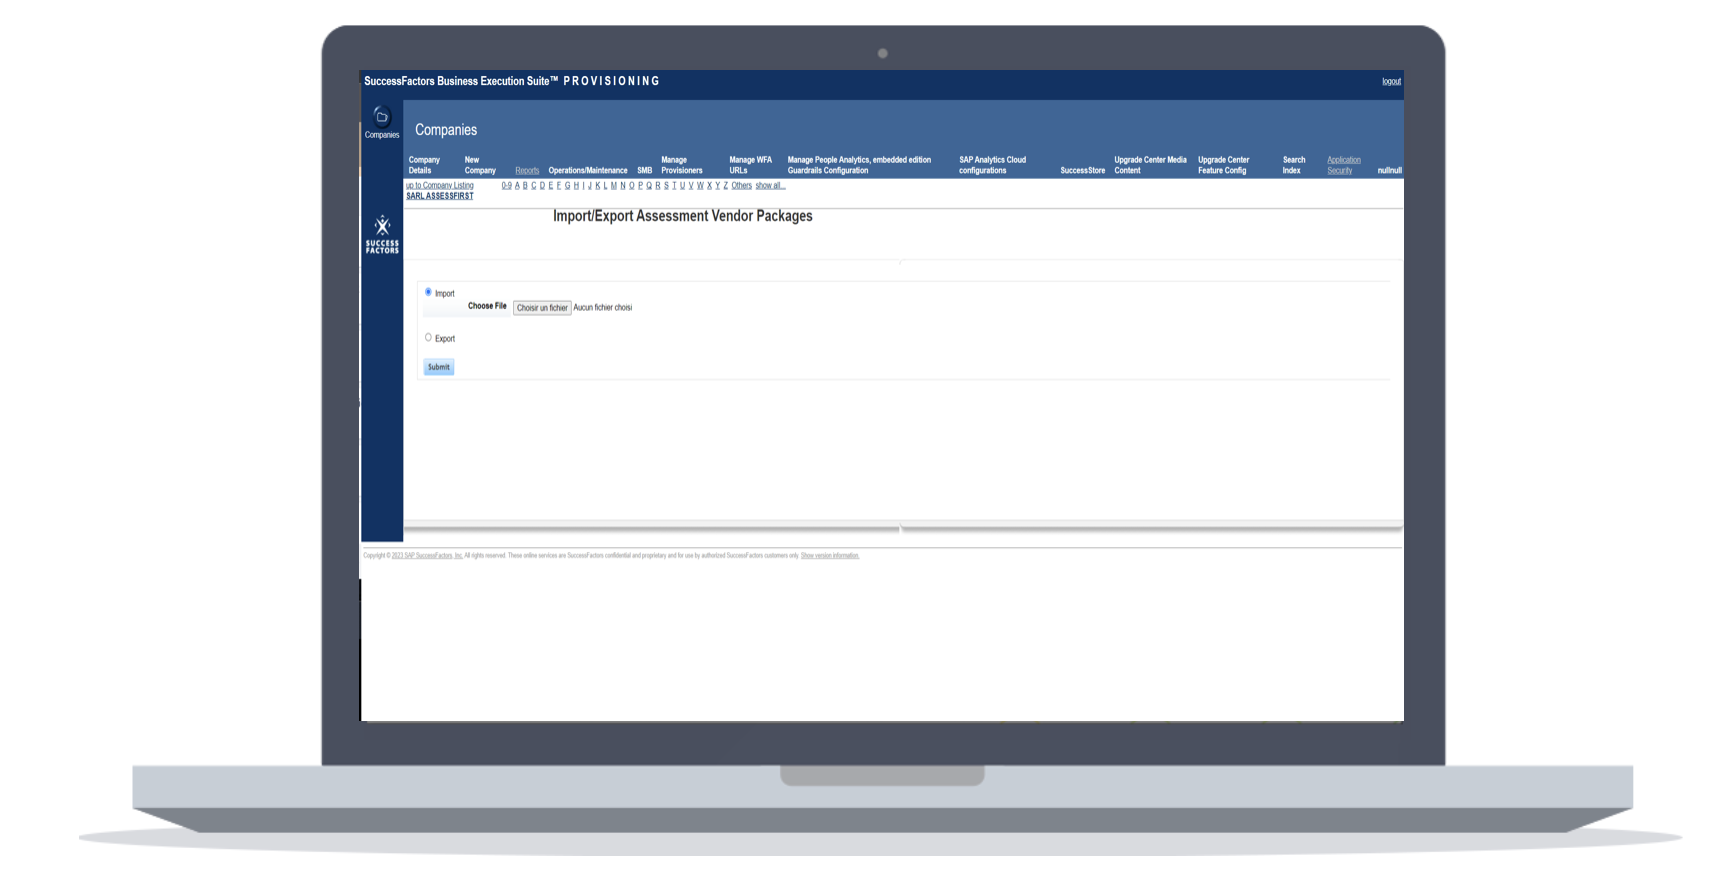
- Access your Provisioning space
- On your company page, go to the "Import/Export Assessment Vendor Packages" page
- Import the template file
- Add a single line with the following information:
- vendorId: the vendor ID created previously, normally "ASSESSFIRST"
- packageCode: 123
- reportPackageCode: ASSESSFIRST
- shortName: AssessFirst
- Add "AssessFirst" to the languages you use
- Import the new file
6/ Create the Oauth client
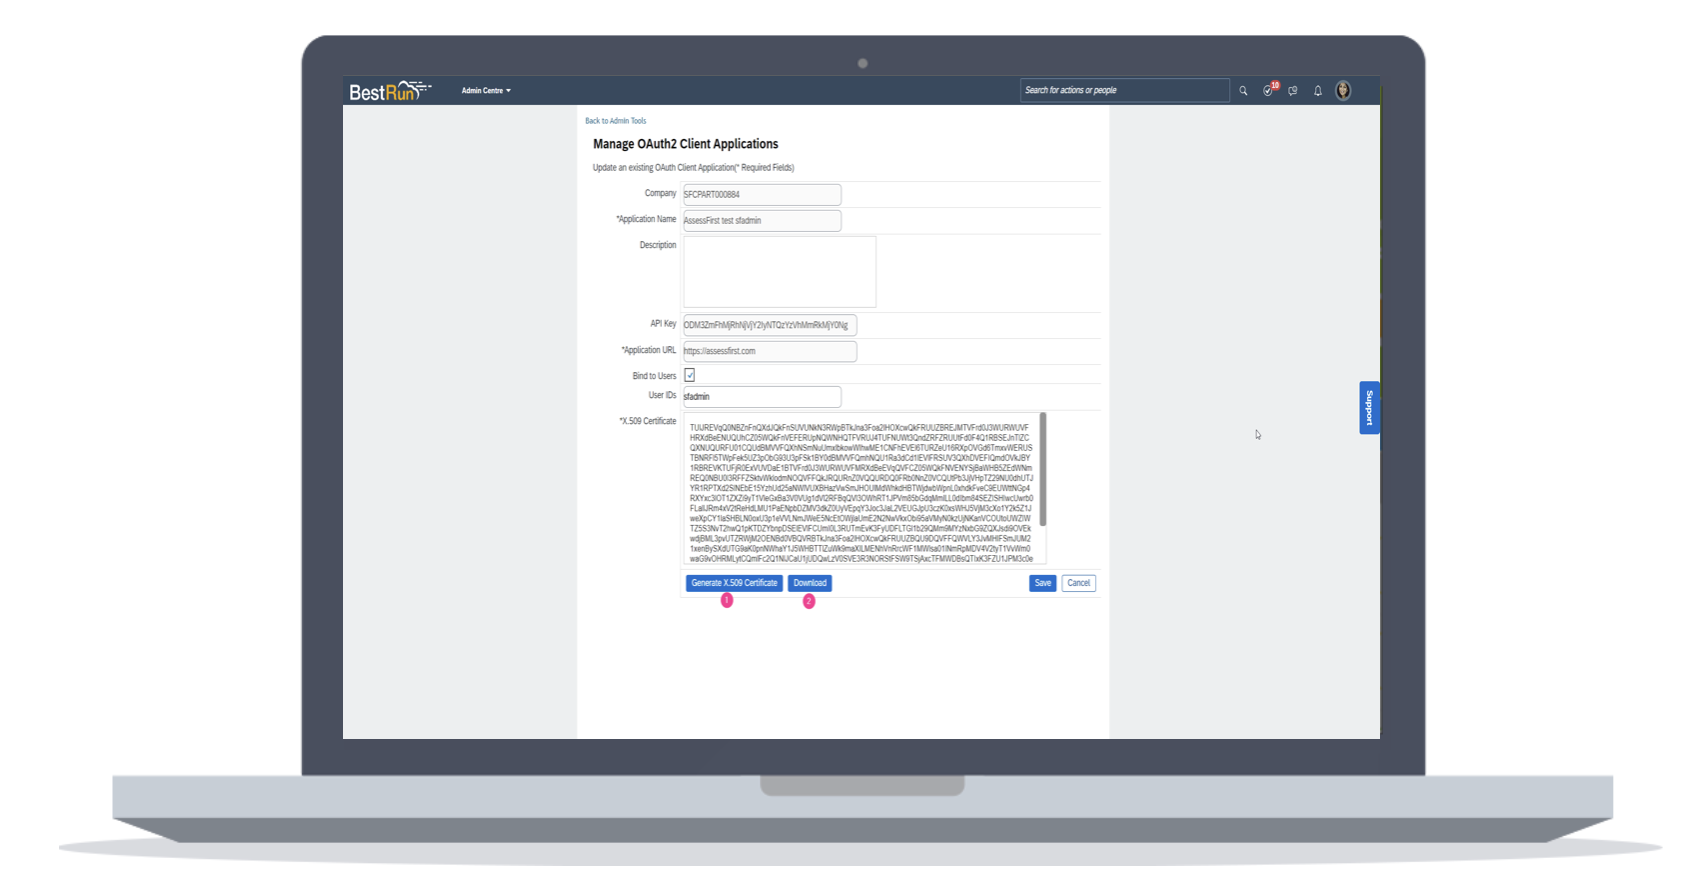
- Go on the page "Manage OAuth2 Client Applications" and create a new client with the button "Register Client Application" and complete the form with the following data:
- Application name: AssessFirst
- Application URL: https://www.assessfirst.com
- Click on "Bind to users"
- User IDs: the assessfirst user you created
- Click on "Generate X.509 Certificate" and create a certificate with
- Common Name (CN) =
- For production -> "app.assessfirst.com"
- For test -> "simu.assessfirst.com"
- Validity (days): "3650"
- Common Name (CN) =
- Click on the button "Download" and copy the "API key"
- Click on Save
7/ Activate the integration in the AssessFirst marketplace
- Click on the icon at the top right to access your settings and select Integrations
- Click on SAP SuccessFactors
- Click on Activate
- Enter the API key (In the Client ID field)
- Enter the username (ex : assessfirst-user)
- Enter the Web service URL (ex : https://api2.successfactors.eu, ...)
- Tenant ID -> You can ask your SuccessFactors administrator to provide them.
- Paste the full certificate you downloaded. It should be in a file, you can open it with Notepad
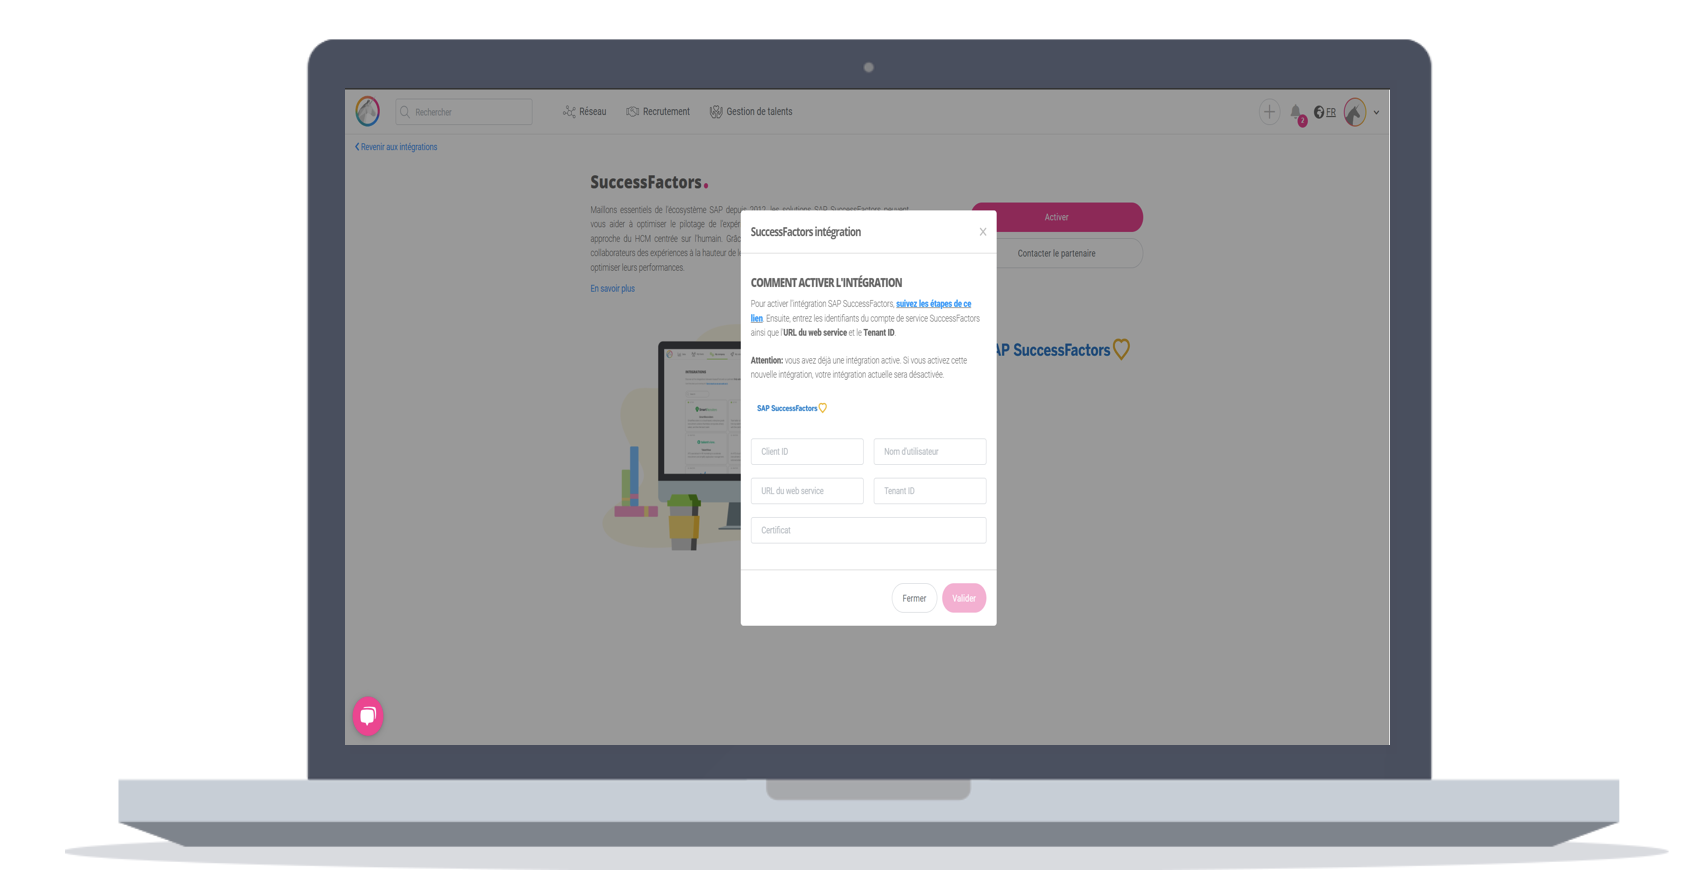
After validation, a username and password will be displayed. You can copy and paste them to proceed to the next step.
8/ Setting up technical notifications
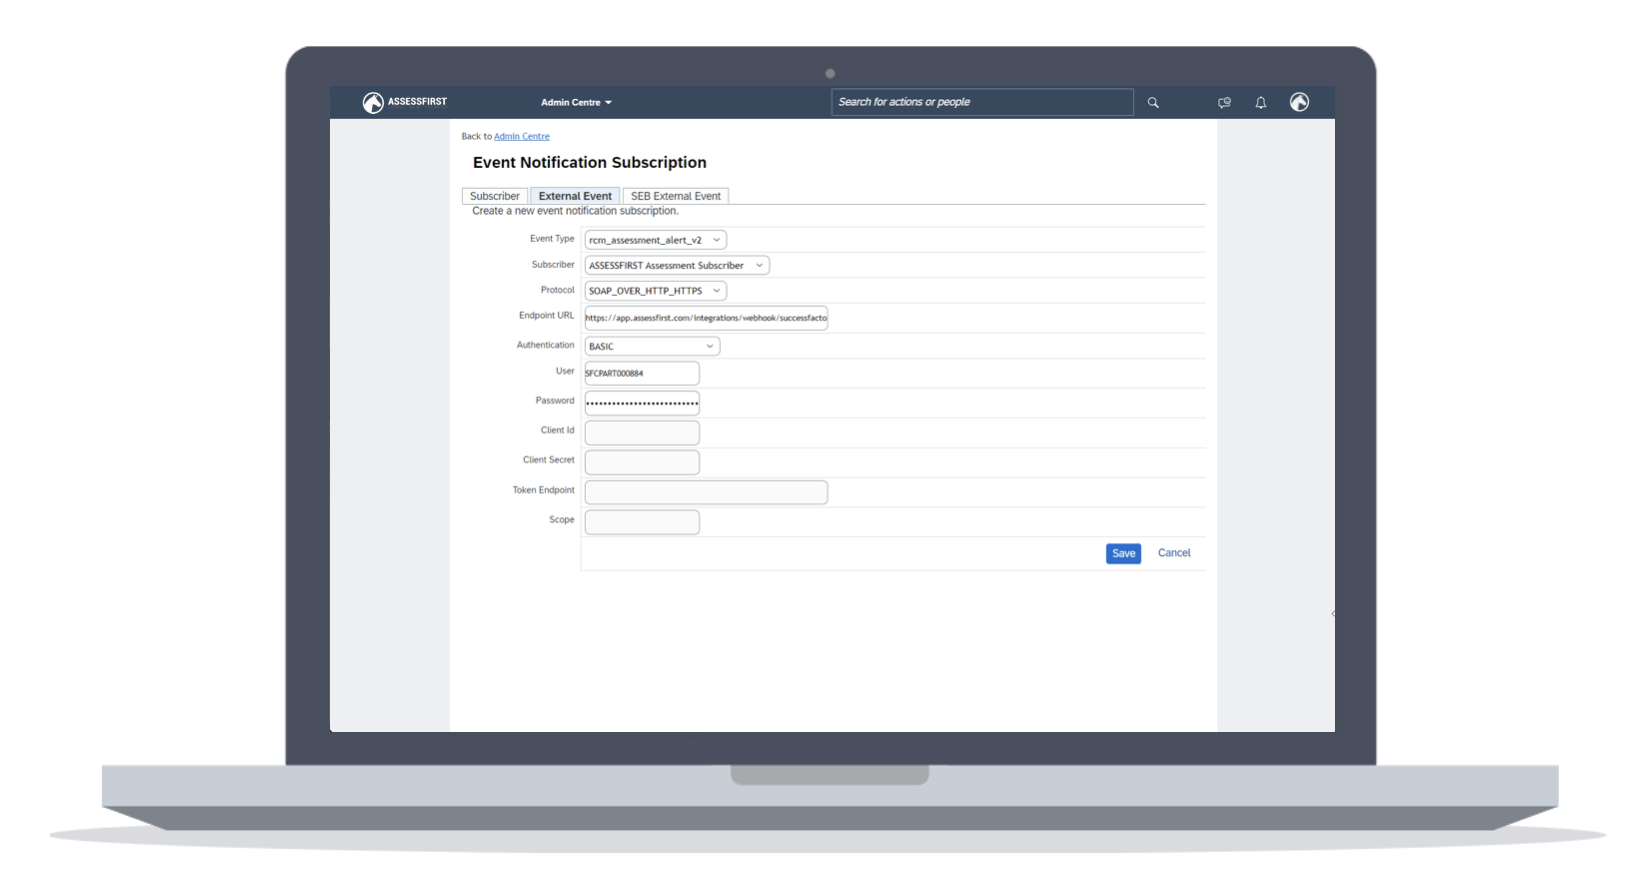
- Go to the "Event Notification Subscription" page and add a subscriber with the following information:
- Category : Customized
- Subscriber id : ASSESSFIRST
- Name : ASSESSFIRST
- Group : leave empty
- Client id : ASSESSFIRST
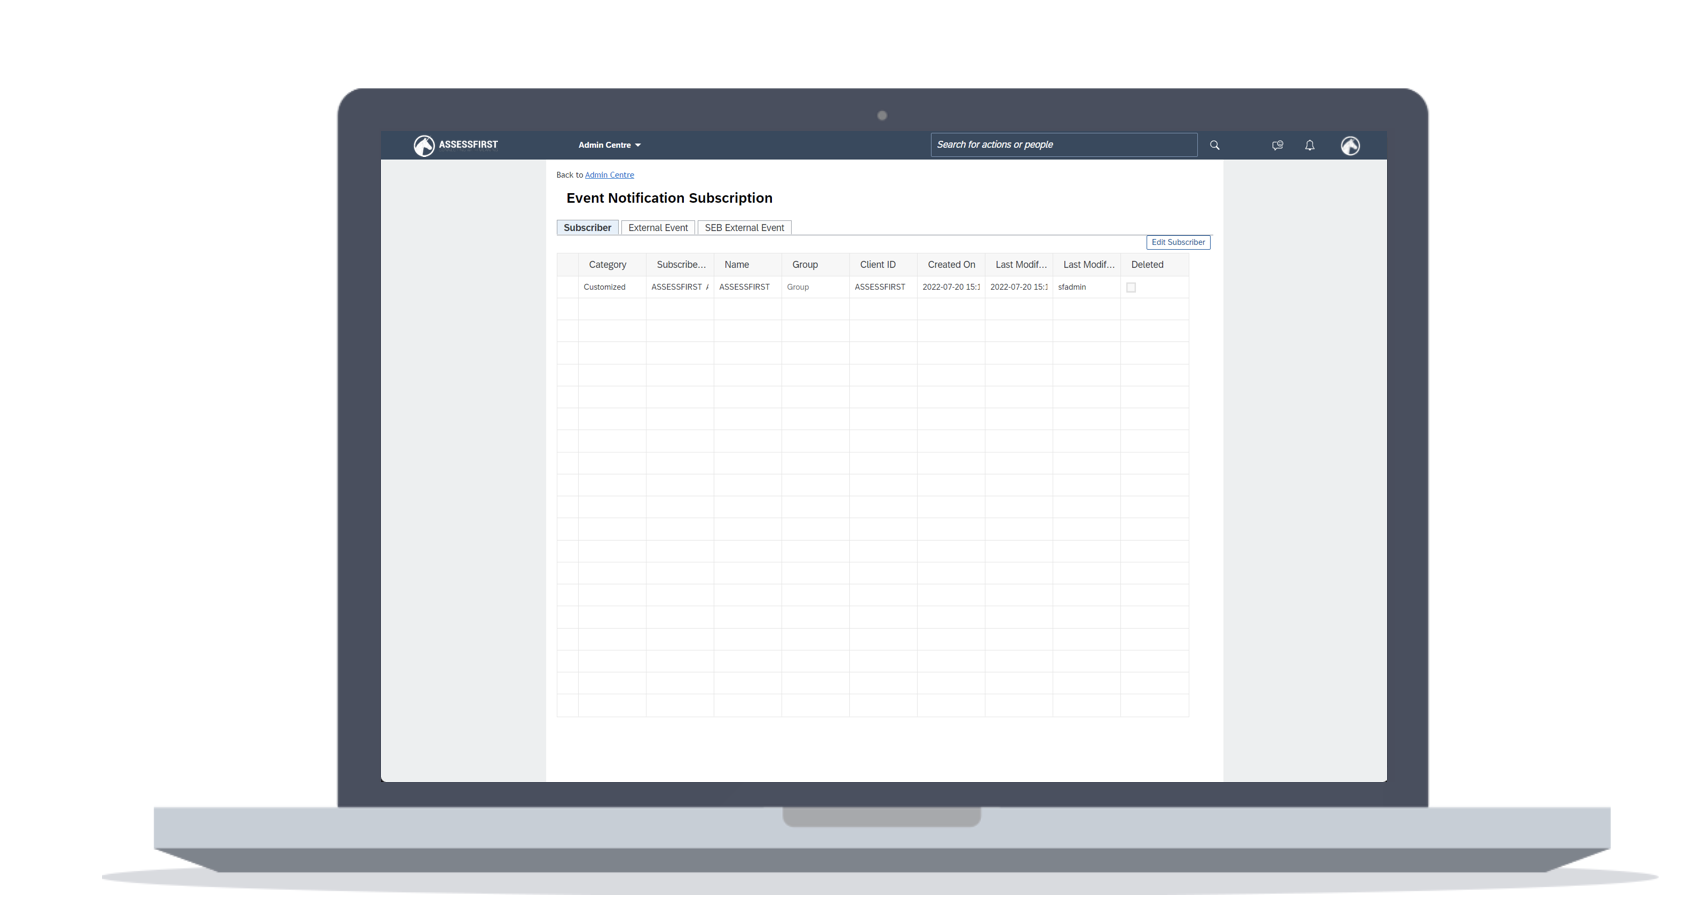
- On the external event tab, add an event with the following information:
- Event type : rcm_assessment_alert_v2
- Subscriber : ASSESSFIRST
- Protocol: SOAP_OVER_HTTP_HTTPS
- Endpoint URL: https://app.assessfirst.com/integrations/webhook/successfactors (or https://simu.assessfirst.com/integrations/webhook/successfactors if you are on a testing environnement)
- Authentication, 2 options :
- Basic
- User: the login provided by the AssessFirst activation popup (it should be your tenant)
- Password: the password provided by the AssessFirst activation popup
- Client_credentials (Oauth 2.0)
- Client ID : the login provided by the AssessFirst activation popup (it should be your tenant)
- Client Secrect : Secret provided by the AssessFirst activation popup
- Token Endpoint : https://app.assessfirst.com/integrations/successfactors/access_token (or https://simu.assessfirst.com/integrations/successfactors/access_token if you are on a testing environnement)
- Scope : recruiter
- Basic
To learn how to use the integration with SAP SuccessFactors, click here


