1. Configure a Predictive Model
3. Retrieve a Candidate's Results
1. Configure a Predictive Model
When creating or editing a job post, you can add or edit the "Assessments" section.
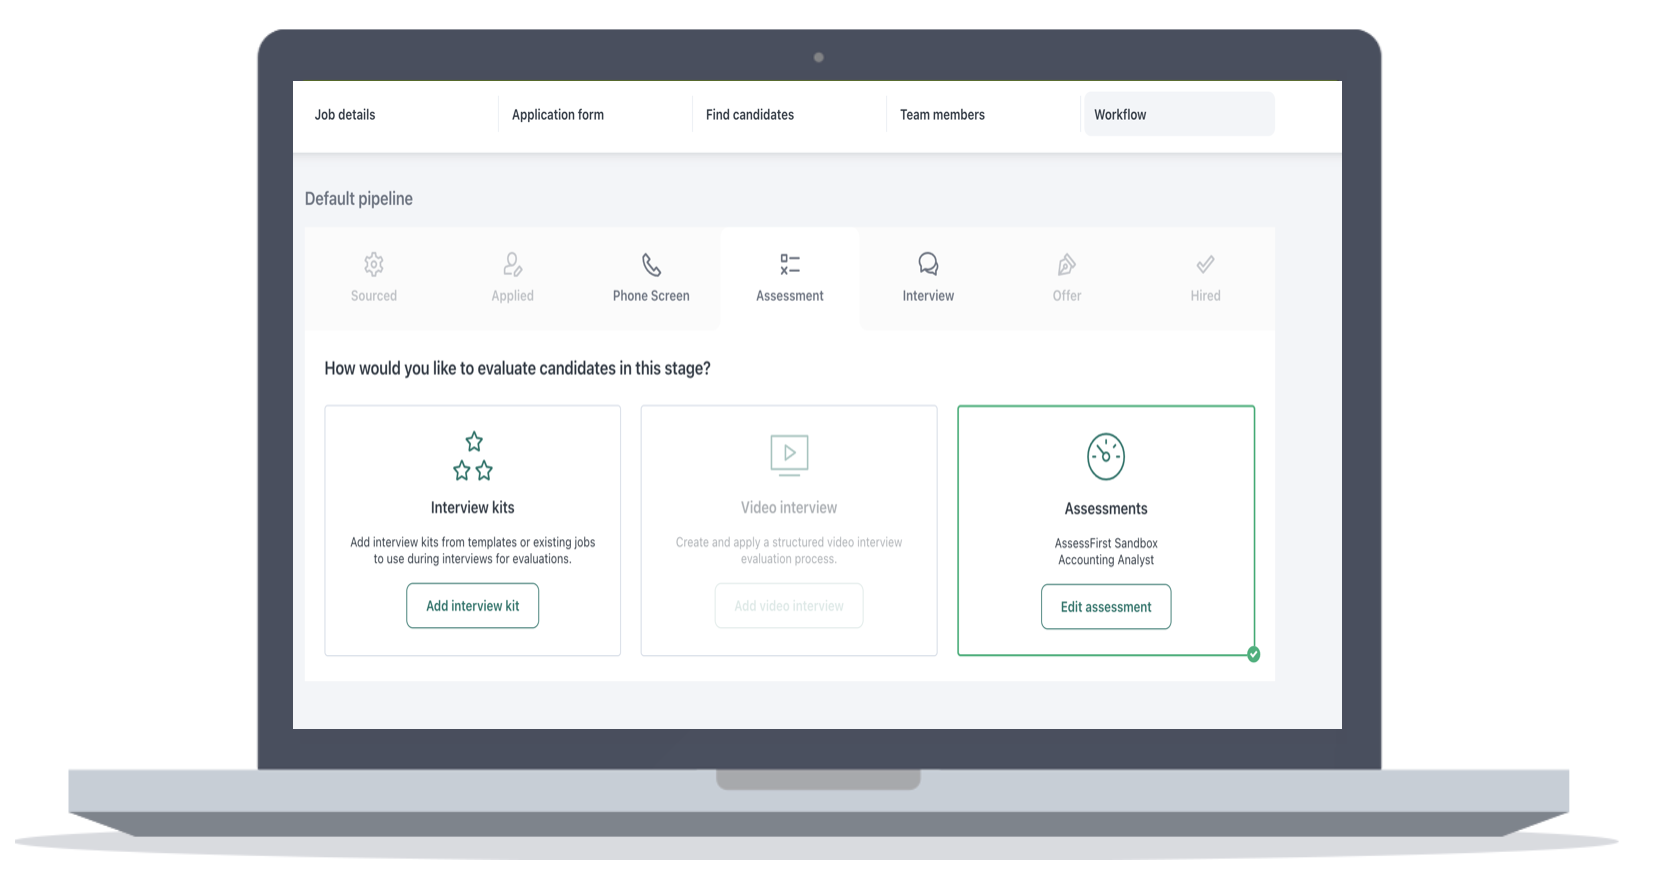
Click on the AssessFirst band.

Pre-select your predictive model from the list that appears.
The dropdown list is displayed alphabetically and includes all your custom models as well as benchmark models.
Save your choice at the bottom of the page.
2. Send Your Invitations
To send an invitation, your candidate must be in the "Assessment" section.
![]()
For all your candidates in the "Assessment" section, you will see a new icon that allows you to send an invitation.

When you click on this icon, a pop-up will appear, allowing you to validate the predictive model that was pre-selected for the position.

The candidate will receive an email enabling them to create their AssessFirst account and complete the questionnaires.
3. Retrieve a Candidate's Results
Once the candidate has completed all the questionnaires, you will see the results displayed in the "Review" tab.
To retrieve the results in Workable, the candidate must have completed all three questionnaires: Swipe / Drive / Brain.

You will find the match scores for Swipe / Drive / Brain, overall match score, as well as the A-Player score.
A redirect link to the AssessFirst application allows you to view the reports directly on the candidate's account.
To learn how to activate the integration with Workable, click here.